Tutorials - Environmental Justice Tool: Custom Mapping Key Features |
Download Printer Friendly PDF |
Overview:
This tutorial will show you how to use the MA DPH Environmental Justice (EJ) Tool to:
- Select features within a buffer of specified distance.
- Export the selected feature data.
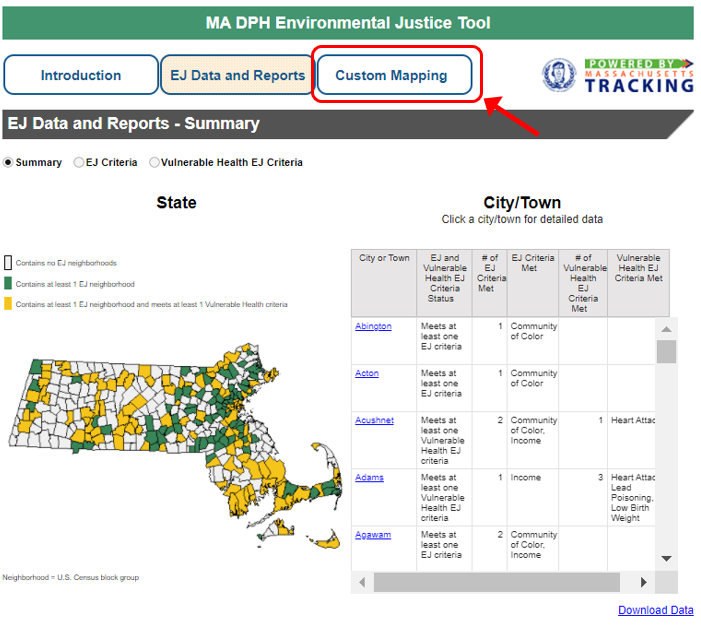
1. Navigate to the CUSTOM MAPPING section of the MA DPH EJ Tool.
- Click the CUSTOM MAPPING button from any view of the MA DPH EJ Tool.
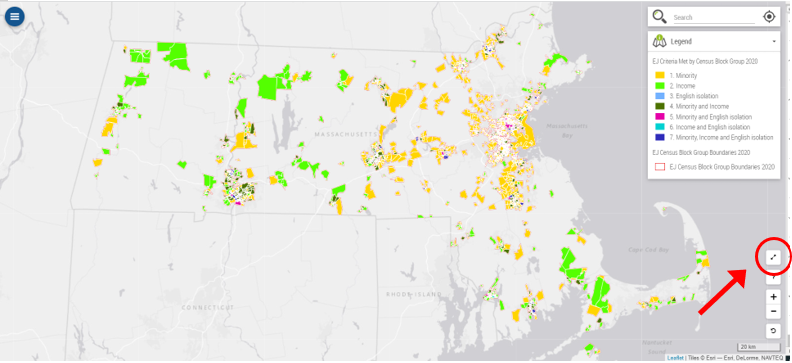
2. Expand to Full-Screen Mode for an enlarged view of the map.
- For Full-Screen Mode, click the ENLARGE MAP icon
 in the bottom right of the map.
- Expanding to Full-Screen mode opens a new map, so enlarge before beginning.
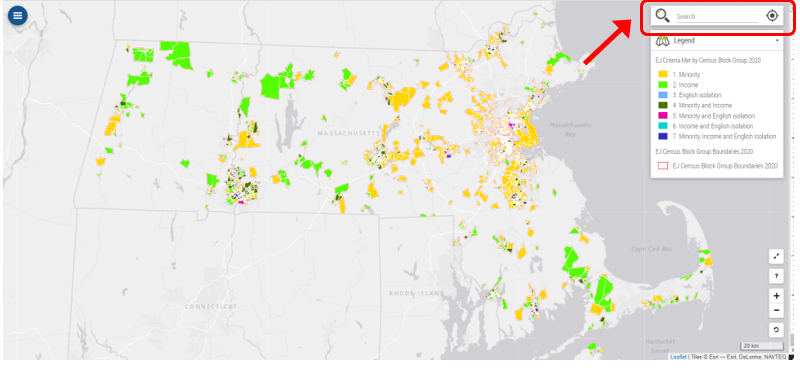
3. Locate the address of interest.
- Click the search bar in the top right of the map and begin typing the address.
- As you type, options will appear below the search bar.
- Click the option below to select the correct address.
- Review the Finding Your Address tutorial for more tips on available map features, including adjusting data layer transparency.
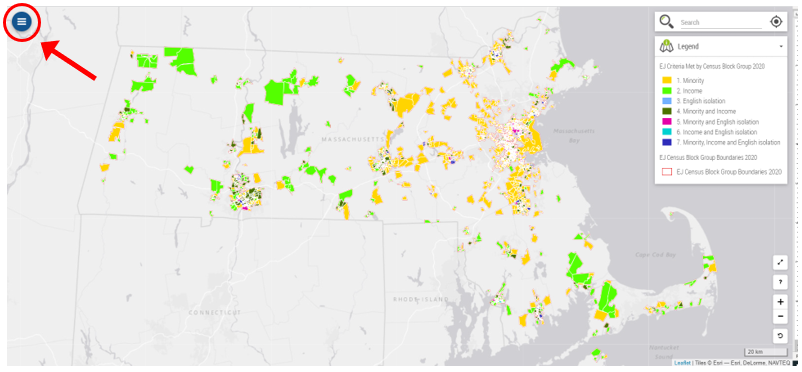
4. Click on the CIRCLE MENU icon on the top left of the map.
5. Turn on data layers of interest.
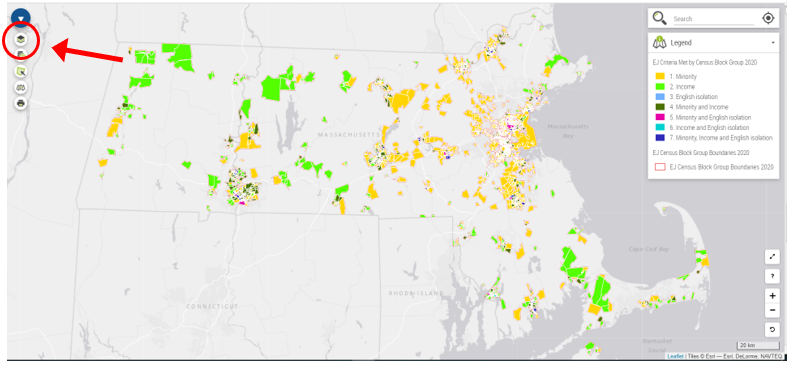
- Click the LAYERS icon (first icon down) to open the list of available layers.
- “Turn on” data layers of interest by hovering over the layer name and clicking the toggle to the right of the layer name.
- Learn more about turning on data layers by reviewing the Advanced Setting tutorial.
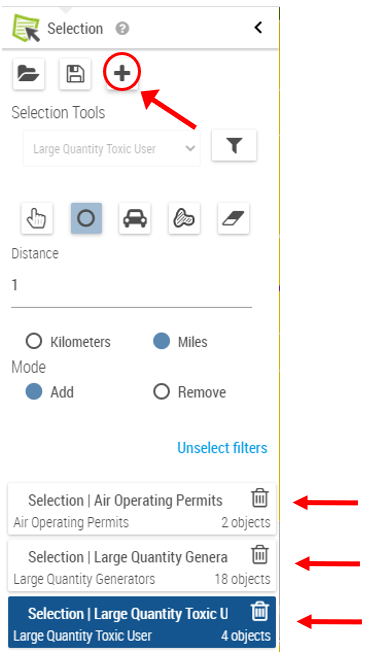
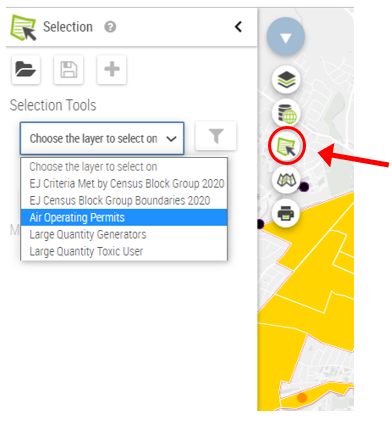
6. Select a layer of interest to buffer.
- Click the SELECTION TOOL icon (third icon down) to open the settings.
- Click to select one layer of interest from the SELECTION TOOL dropdown menu.
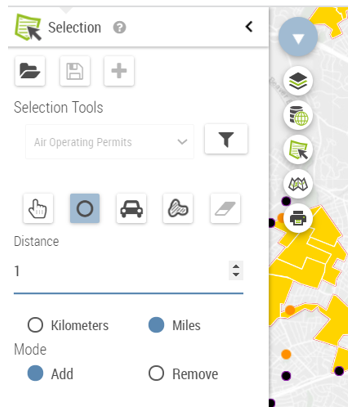
7. Set the distance and units of the buffer.
- Click the ISO-DISTANCE (CIRCLE) icon. Input the buffer distance and units.
8. Complete the selection of features within the specified buffer distance.
- Clicking the LOCATION MARKER icon
 of the address of interest will:
 - Create a temporary circle of the selection buffer.
- Select the features (points or polygons) from the layer of interest.
- Selected polygons will appear highlighted in blue:

- Selected points will appear as green location markers:

- Create a pop-up table of the selected map features.
- If the layer of interest has no features within the buffer, then none will be selected.
- Zoom in or out (+ or - at the bottom right of the map) to see the buffer extent.
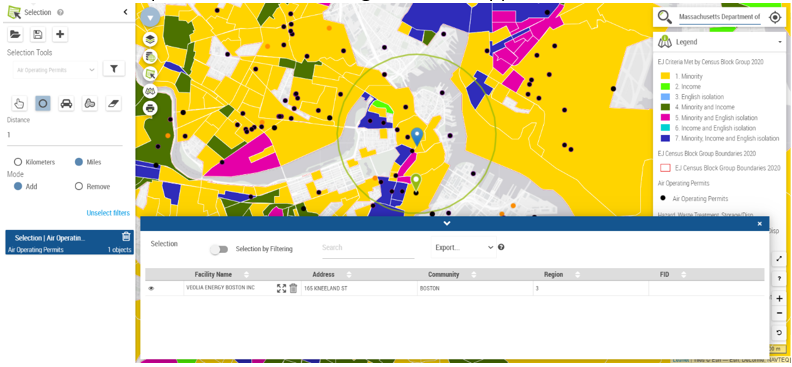
9. Export and save the data for the selected features within the buffer.
- To export and save the data for features within the selection buffer, choose the desired file type from the drop-down menu above the pop-out table.

10. Select from additional feature layers.
- Click the ADD NEW SELECTION icon
 to select a different data layer.
 - Repeat steps 5 to 8 for each data layer of interest.
- Data layers must be “turned on” from the layers list (step 5) to be available in the drop-down menu of the selection tool.
- Data tables for selected features from each additional layer are saved and listed in the selection tool panel, below the selection options.
- Use Microsoft Excel or a text editor to combine exported files of the same type into a single file.